Physical principle: Find out more about this research here.
Reference: “Strong optical coupling through superfluid Brillouin lasing,”
X. He, G.I. Harris, C.G. Baker, A. Sawadsky, Y.L. Sfendla, Y.P. Sachkou, S. Forstner, and W.P. Bowen,
Nature Physics (2020). https://doi.org/10.1038/s41567-020-0785-0
[pdf link].
Rendering details:
The provided .blend file is made with Blender 2.79, and the Cycles Render (ray tracing).
The goal of this animation is to illustrate the mechanism behind low-threshold Brillouin lasing in superfluid films. In the backward Brillouin scattering process described here, pump laser light (red arrow) scatters off a travelling surface wave in the superfluid, which forms a travelling refractive index grating. The acoustic wavelength of the superfluid wave is approximately one-half that of the light, such that it forms an effective Bragg-type reflector. Since the superfluid wave is moving away from the pump, the reflected light (green arrow) is doppler-shifted down in frequency (Stokes process), and the energy difference is provided to the superfluid wave, which grows in amplitude, thus scattering even more pump light. This positive feedback loop leads to a runaway effect (lasing), whereby both the superfluid wave, as well as the scattered Stokes field, display large amplitude, coherent oscillations.
An alternate way of viewing this feedback process, which is relevant to the Blender illustration, is that the beat between pump and Stokes fields leads to localized optical intensity pattern, which slowly rotates at the speed of the acoustic wave which generated it in the first place. Through a combination of radiation pressure forces and superfluid fountain effect forcing, this optical intensity pattern then pulls in even more superfluid into the regions of high light intensity, thereby reinforcing the superfluid acoustic wave in a positive feedback fashion.
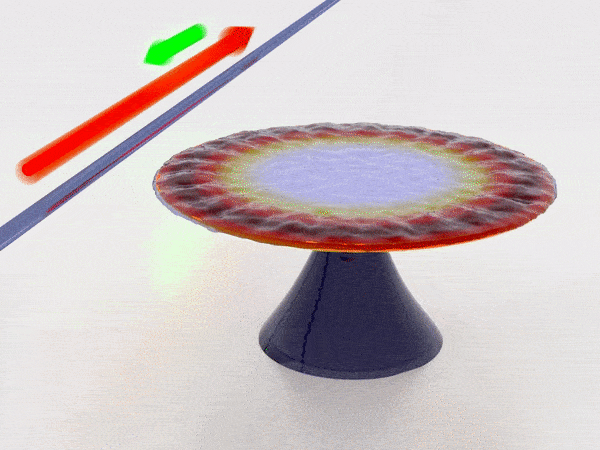
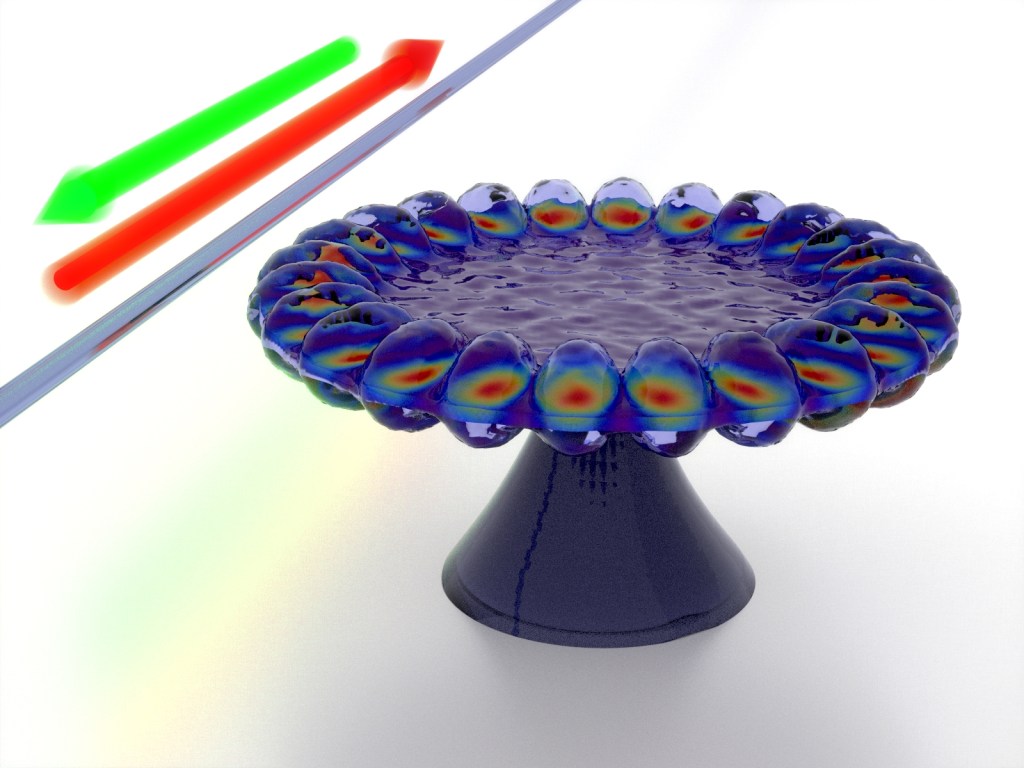
For this reason, the animation contains three main sections.
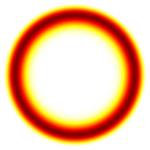
- At the begining (see image below, left) the superfluid wave has a small amplitude and is scattering very little pump light (small green arrow). Light in the cavity therefore comes mainly from the pump beam. Light in the whispering gallery mode resonator is therefore travelling clockwise at the speed of light, leading to a time-averaged optical intensity which is essentially constant. Indeed, the optical field oscillates at ~10^14 Hz —much faster than the response time of the superfluid film— which only experiences the time-averaged intensity, as illustrated by the continuous intensity profile along the resonator periphery.
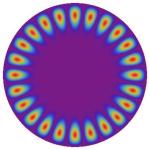
- As more light is scattered from the pump to the Stokes beam, the localization of the light intensity due to the beating between pump and Stokes fields becomes apparent (see image below, middle).
- Finally, in the steady-state, the presence of both strong pump and Stokes fields leads to an optical intensity pattern with localized regions of high and low intensity, slowly rotating in the resonator at the speed of sound.

Beginning 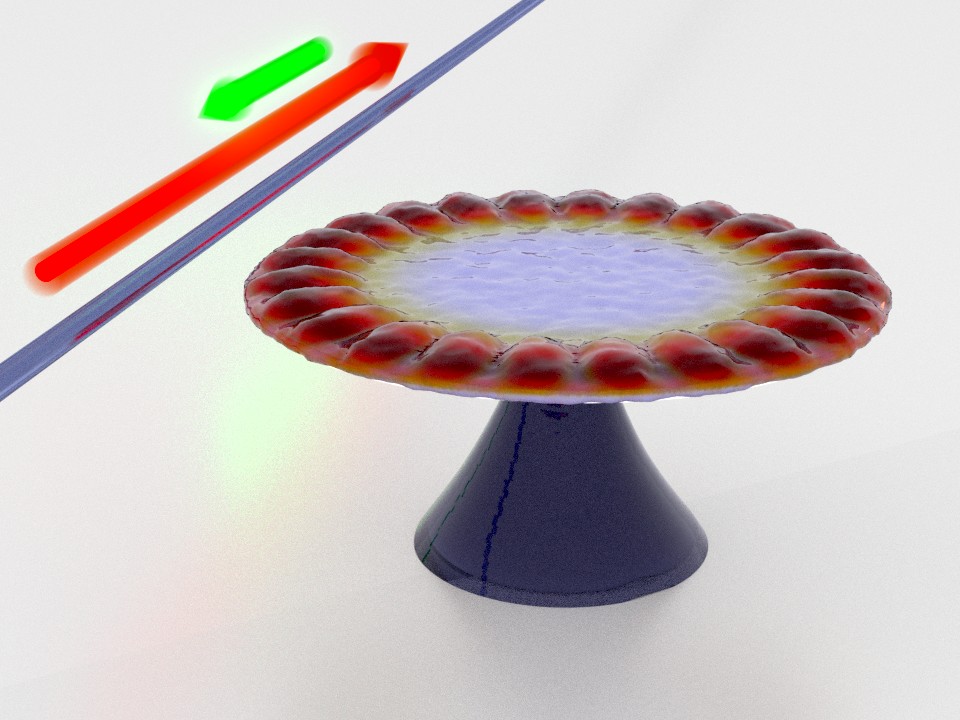
Middle 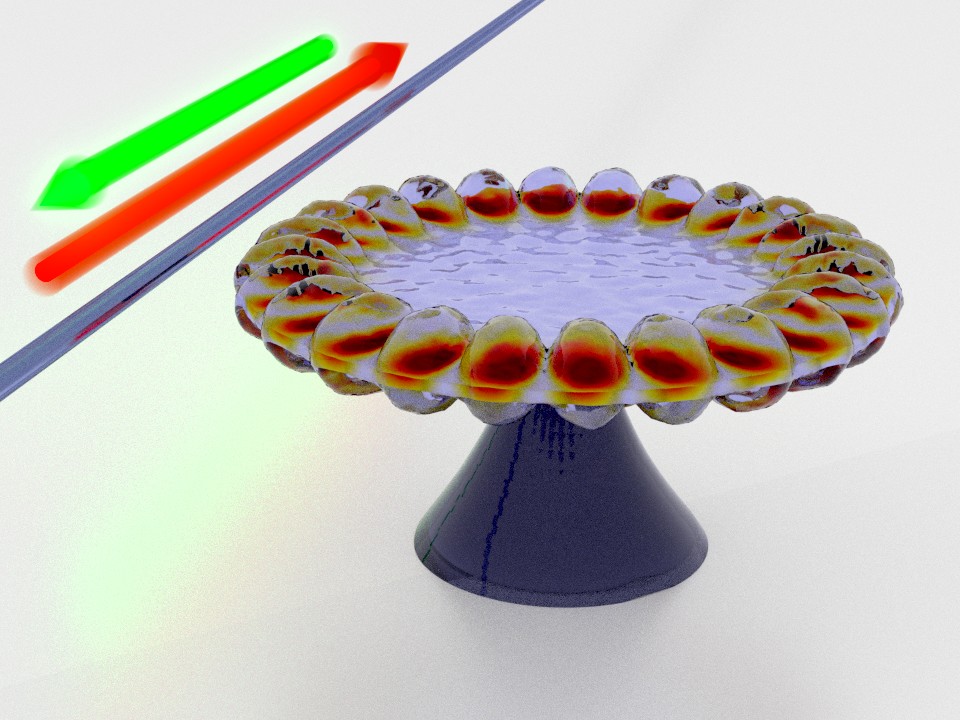
End

Travelling optical field time-averaged intensity 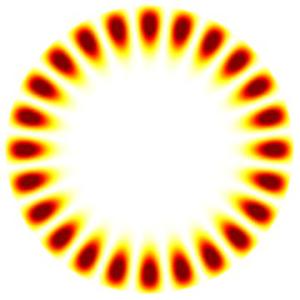
Localized optical intensity due to beat between pump and Stokes fields
In order to animate the process, we’ll describe first the optical field, then the acoustic wave in the superfluid film. The animation contains 165 frames. The first 150 represent the growth phase, where the amplitude of the superfluid wave increases. The last 15 frames correspond to the steady-state regime of lasing. Read more about the basics of animation, including the use of keyframes here.
The optical field in the disk is represented using a texture (WGM1.jpeg and WGM2.jpeg included in the zip file; WGM3.jpg and WGM4.jpg correspond to the same information with a different color scheme as discussed later). The transition from a continuous to a localized optical field is done using a Mix shader, which gradually switches from the continuous to the localized optical field texture between frame 1 and 150 (see settings in screenshot below). This transition is done by switching the ratio of textures between 0 and 1 in the ‘Fac’ setting of the Mix shader, using keyframes. (Select the first frame in the timeline at the bottom of the screen, then enter 0 in the Fac setting, right-click on the Fac setting box and select insert keyframe; next go to Frame 150, enter 1 in the Fac setting box, then right-click again and enter another keyframe. All intermediate values are automatically interpolated, as discussed for example in the spring animation example). The rotation of the optical beatnote is achieved by having the disk itself rotate, using keyframes as well, as illustrated below (the disk performs a full 360 degree rotation between frames 1 and 150). A small detail here: by default the interpolation setting is set to ‘Bezier’, which means the rotation smoothly ramps up in speed from 0 rpm up to its steady state, then decelerates at the end to reach 0 rpm again. This is not scientifically accurate here as the superfluid acoustic wave always propagates at the same speed (the speed of sound) and thus always at the same angular velocity. This can be changed by selecting the disk, going into the ‘graph editor’, selecting all points with ‘A’, then setting the interpolation to linear using the ‘T’ key (see screenshot below).

Disk settings frame 1 
Disk settings frame 150

Fitting the optical intensity profile texture to the disk in the UV editing settings 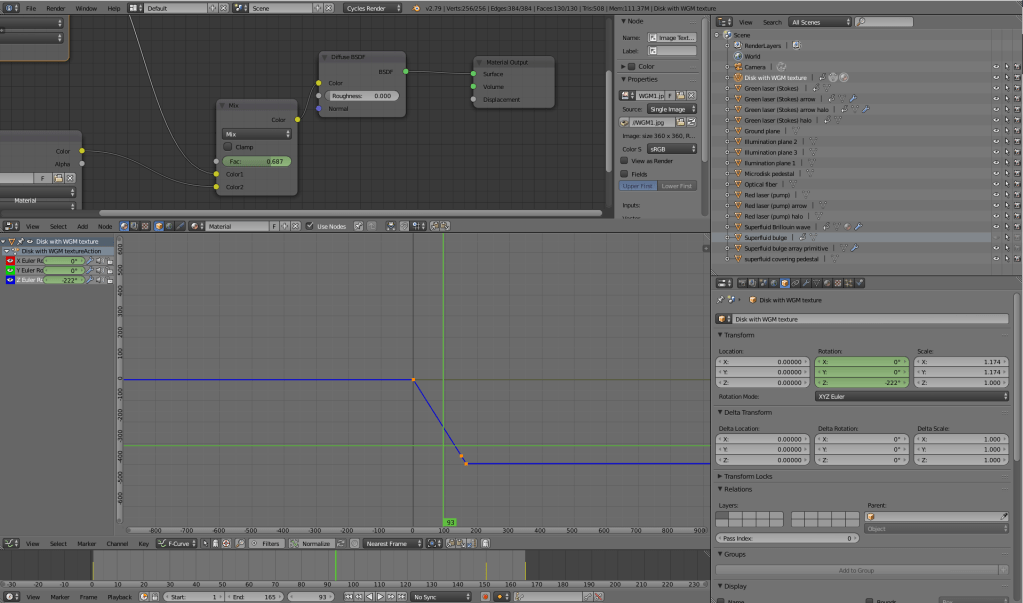
Setting a linear interpolation for the disk rotation
The superfluid film is modelled in a way which is a bit more complex, in order to get a realistic fluid looking surface with ripples. It is formed by the union of a static film, and a rotating and growing superfluid bulge wich represents the growing amount of superfluid trapped in the regions of high light intensity. Using the same keyframe techniques as described previously, the superfluid bulge rotates and grows between frames 1 and 150, using keyframes in the ‘Rotation’ and ‘Scale’ settings. The superfluid bulge is formed by an array of elongated spheres, bent into a circle (see ‘Superfluid bulge array primitive’).
The ‘Superfluid Brillouin wave’ is then formed by a simple superfluid disk, altered with the following modifiers: ‘Boolean’, ‘Remesh’, Subsurf (subdivision surface), ‘Smooth’ and ‘Displace’, which can be accessed under the ‘modifier’ tab, see screenshot below.
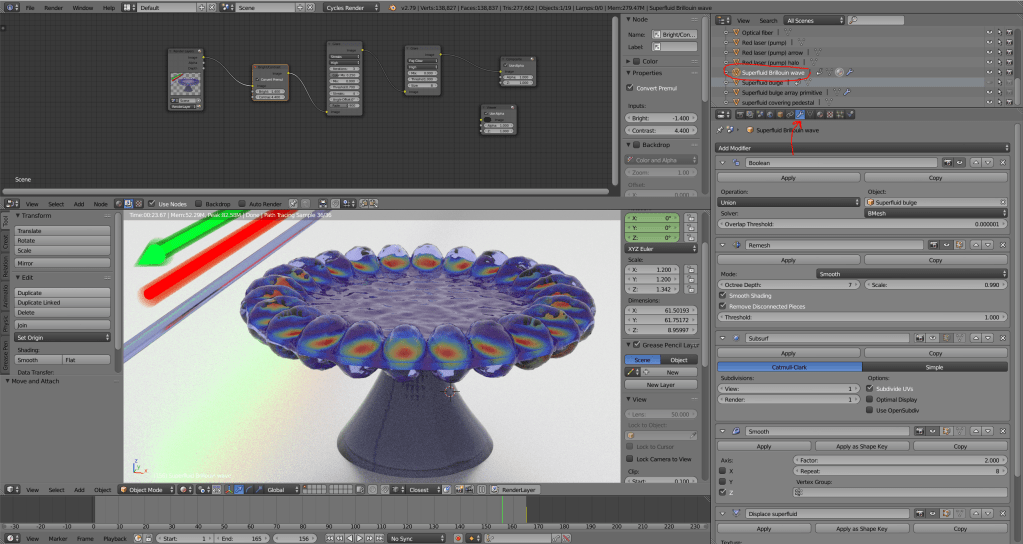
modifier settings for the superfluid wave 
Smooth union with ‘Remesh’ modifier
The ‘Boolean’ modifier forms a union between the superfluid disk and the superfluid bulge pattern. The ‘Remesh’ modifier forms a new mesh allowing for a more smooth union of the two objects, as illustrated above. The subsurface modifier (optional) densifies the mesh, adding more mesh points; the ‘Smooth’ modifier smoothes the mesh as its name indicates, while the ‘Displace’ modifier adds some displacement noise to the mesh in order to create ripples on the surface of the fluid. The influence of each modifier can be observed in the viewport by activating or deactivating it with the eye symbol next to its name.
The ‘Displace’ modifier is what creates a more realistic fluid-like surface. The strength of the effect is set in the modifier itself, while the type of noise it applies is set via a texture (see screenshot below). The preset ‘Clouds’ noise provides good results. The spatial period of the ripples is set with the ‘Size’ setting of the noise texture, as shown below.

Displace modifier settings 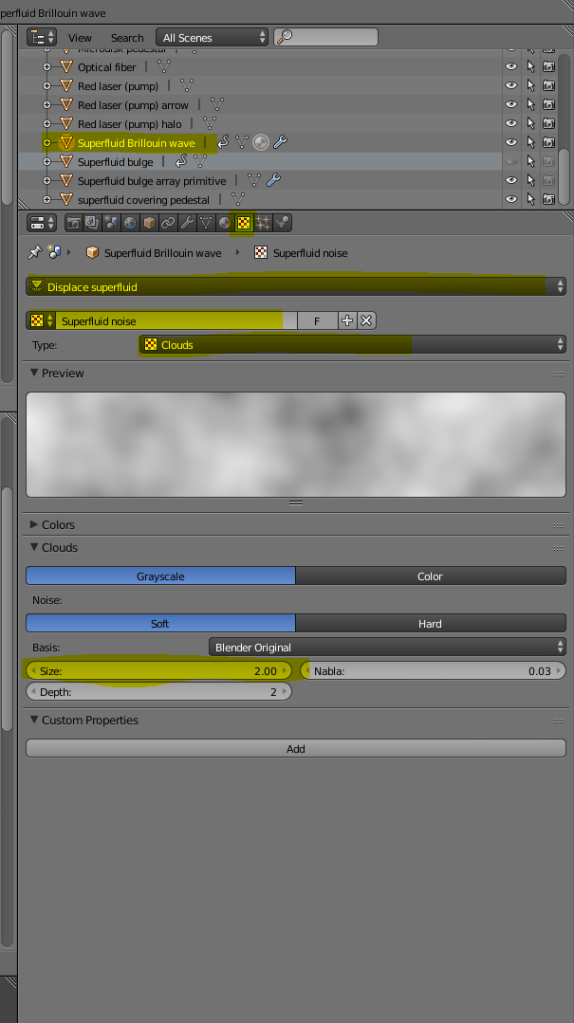
Displace modifier settings
The texture of the WGM used for the disk can be changed, using the textures included in the zip file, which changes the overall appearance of the rendering, as illustrated below. In order to change the texture, replace the texture file as illustrated in the ‘Disk settings frame 1’ screenshot at the top of the page. More WGM textures can be generated with the Mathematica file provided below, for instance in order to change the WGM azimuthal and radial node counts.


Read more:
“Strong optical coupling through superfluid Brillouin lasing,”
Nature Physics (2020). https://doi.org/10.1038/s41567-020-0785-0
[pdf link]
Keywords: Superfluid optomechanics, Brillouin scattering, Brillouin scattering in superfluids, strong mechanically-mediated optical coupling, ultra-low threshold Brillouin lasing, Radiation pressure coupling, superfluid fountain pressure, superfluid thin films, superfluid helium 4, superfluid entropy gradients, whispering gallery mode resonator in Blender 3D, whispering gallery mode resonator animation, whispering gallery mode texture, whispering gallery mode Blender.
